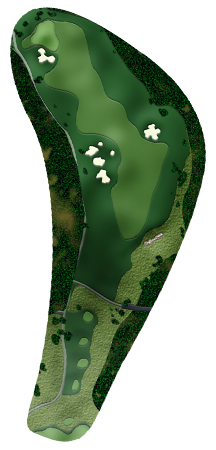
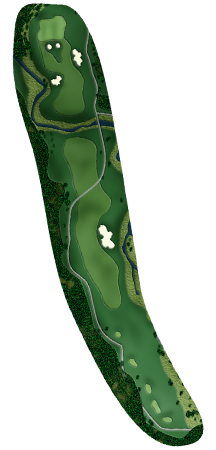
The opening hole is a downhill, dogleg left par-4, and longer hitters can cut the corner and carry the bunkers on the left. A drive too far right can go through the fairway. Due to the drop in elevation from tee to green, this hole plays shorter than the listed yardage.
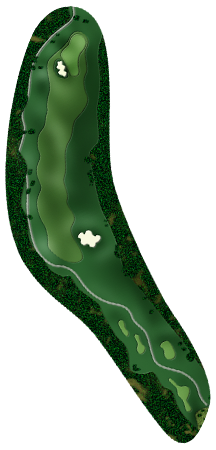
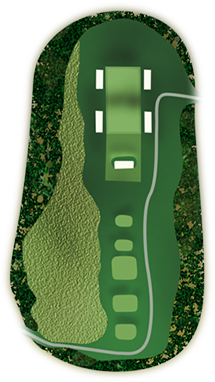
The par-3 second hole plays over a pond to a green guarded by three bunkers in front. Be cautious, the wind can be a factor, even though it is usually calm at the tee.
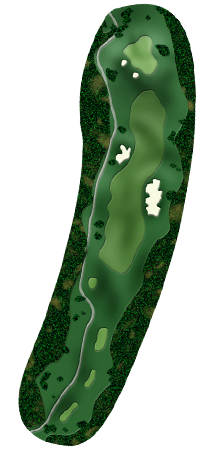
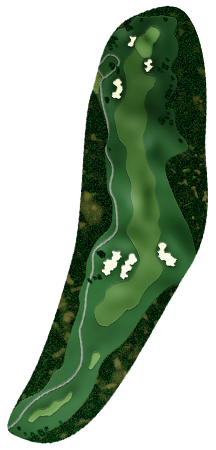
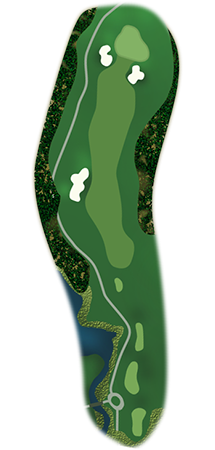
Play your tee shot to the 150-yard marker or left of it on the par-4 third hole. A shot that strays too far right off the tee will require an imaginative second shot. A creek splits the fairway just short of 100 yards from the green.
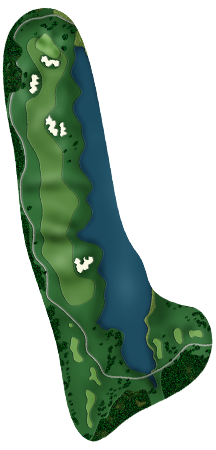
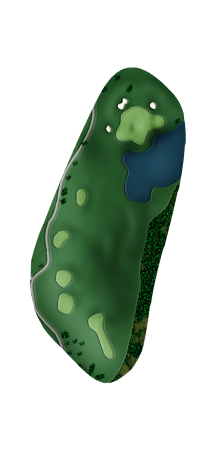
Go with an extra club on the par-3 fourth hole as anything left short and left will end up in the pond. The safe play is to the middle or right side of the green.
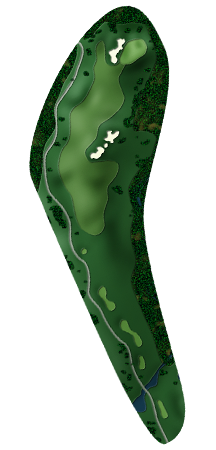
Hole No. 5 is a dogleg right par-4 and longer hitters can go through the fairway on the left if they are not careful. However, do not bite off more than you can chew and try to cut too much of the corner. Favor the center to left side of the green with your approach.
Favor the right side of the fairway on the par-4 sixth hole; the slope will help bring tee shots toward the center of the fairway. Accurate distance control on the second shot is required to hit the right level of this three-tiered green.
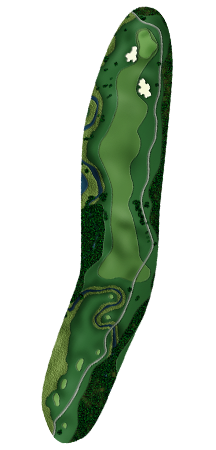
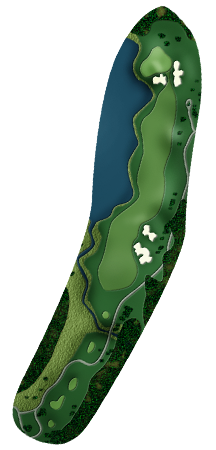
Watch out for the creek on your left with your tee shot on the par-5 seventh hole. Long hitters can reach the green in two. The front of the green is open and invites boldness on your second shot. The smart play might be to layup short of the fairway bunker on the right instead.
The tee shot on the par-4 eighth hole is all about proper positioning. Avoid the lake on the left and bunkers on the right. The green is deeper than it looks.
Aim for the 250-yard stake off the tee on Hole No. 9. This par-5 is difficult to reach in two, even for the longer hitters. The large, deep green has multiple tiers, so be sure to play to the proper one on your approach shot.
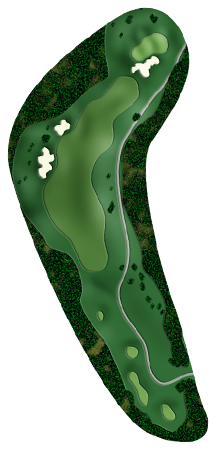
Hole No. 10 is a long, dogleg right par-4. Favor the left side to be safe, but playing from the right side can bring a shorter second shot. The deep green is three-tiered.
Positioning off the tee is more important than length on the par-4 eleventh hole. The uphill approach to the elevated green requires an extra club. Check the pin location before selecting your club.
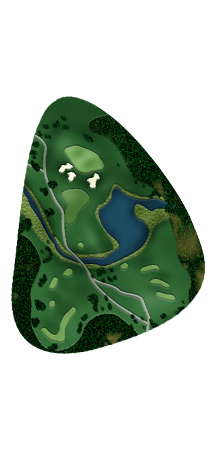
Aim for the 250-yard stake regardless of which tee you are playing from on the par-5 twelfth hole. The green is well-guarded by the bunker in front. Longer hitters can reach in two, but the water on the right will come into play.
The par-3 thirteenth hole drops from tee to green and therefore plays slightly shorter than the listed yardage. Knock it close or you could be left with a difficult putt on this Biarritz green.
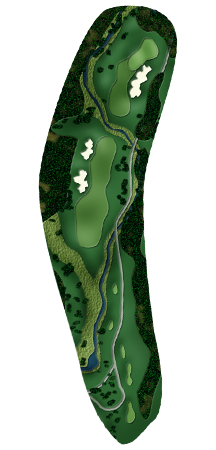
On the par-5 fourteenth hole, longer hitters can play a right-to-left tee shot over the bunker on the left side of the fairway. If you opt to lay up, favor the left side of the fairway. Be sure to check the pin location on the narrow, three-tiered green before hitting your approach.
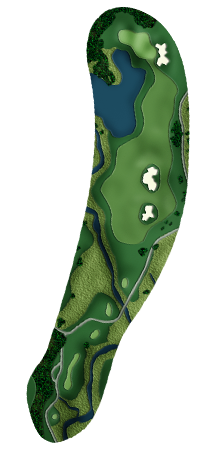
Your tee shot needs to find the center of the fairway on the par-4 fifteenth hole to avoid the lake on the left and bunkers on the right. If the pin is on the left portion of the green, play safe and aim for the center. The slope of the green will help your ball move closer to the hole.
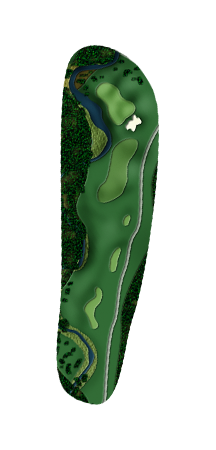
Play a safe tee shot to the center of the green on the par-3 sixteenth hole, regardless of the pin location. This green is well-guarded by sand and water. Check the wind before your shot.
The par-4 seventeenth hole is a slight dogleg right. Favor the right side on the tee shot. Longer hitters can go through the fairway. The uphill second shot plays longer to the elevated green.

The tee shot on the final hole is difficult. You face a forced carry to reach a level lie in the fairway. The second shot is to an elevated, multi-tiered green. Do not go left or long the approach.